
In this blog we are going to set up an Amazon Bra-Ket service and use it to send requests to a real quantum computer via a Jupyter notebook running Python.
Prerequisites
Before we begin we must ensure that we have a recent, stable Python installed on our machine. Please visit the Python website here to download a version. I’ll be downloading Python 3.10 because this matches the Ananconda version that I’ll be installing. After installing Python 3.10, open up a Windows command prompt and type in
(base) > python --version
to check that you have a base Python programming language installed.
Next, since we will be working in 64-bit Windows 11 for this blog, we are going to ensure that we have the Anaconda package manager (for Python 3.10) installed. Visit the Anaconda downloads if you haven’t yet installed it. Out Jupyter Notebook package comes for free with Anaconda.
After this, I followed my previous blog post on setting up (dark) Jupyter Notebooks on a Windows machine.
Next, I used Anaconda to create a new environment
(base) > conda create --name ENV_QUANTUM
and then activated it with
(base) > conda activate ENV_QUANTUM
(ENV_QUANTUM) >
Once inside the virtual environment we can download Qiskit (and its Visualization library) with:
(ENV_QUANTUM) > pip install qiskit
(ENV_QUANTUM) > pip install "qiskit[visualization]"
We should have everything we need now to proceed with the Amazon Bra-Ket setup.
Create a Free AWS Account
Go and create a free Amazon Web Service (AWS) account and sign in to it.
You will need to search for IAM and set up a new Amazon Braket user. Follow the setting up your local development environment instructions here (they are pretty easy to follow).

TL;DR
Setting up your local development environment for the Amazon Braket service essentially gets you to perform the following steps:
- Create and Setup your AWS Account,
- Create your IAM user and give it programmatic access,
- Give your IAM user Amazon Braket Full Access & Job Execution permissions,
- Create (and save carefully) your AWS Access and AWS Secret keys,
You are now ready to enable your Amazon Braket service.
Setup your Amazon Braket Service
When logged in to AWS, you can use the search for services box (or hit Alt+S) to search for the Amazon Braket service:

Access to specific quantum computers is highly region specific, in this example I had to ensure that I was operating out of California, USA which is referred to as us-west-1.
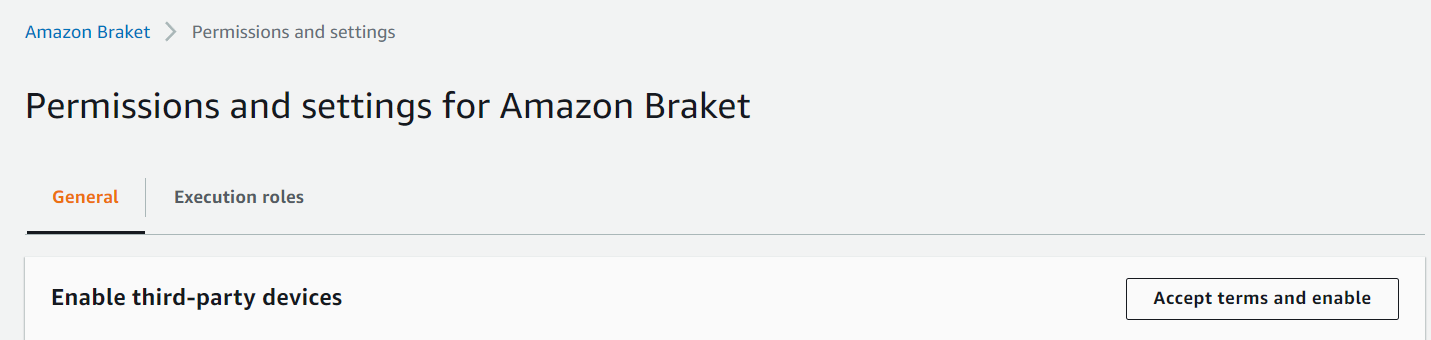
Navigate to the Amazon braket console, click permissions and settings in the bottom left panel.

Now, under the general tab, you need to enable third-party devices and accept terms and enable as per the following screenshot:
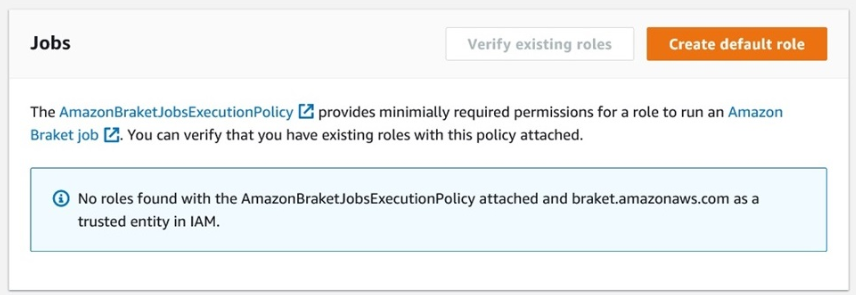
Then, under the execution roles tab, create a service-linked role:

Then, on the same screen, click the verify existing roles button, and then click the orange create default role just to its right.
Amazon Braket on your Local Machine
Now that the remote AWS stuff is sorted, you need to do some additional work getting your local machine setup.
We are still following the local development environment instructions https://aws.amazon.com/blogs/quantum-computing/setting-up-your-local-development-environment-in-amazon-braket/ and we are now up to Step 4. This step (and Step 5) basically involves:
- Downloading and Installing the AWS CLI (Command Line Interface),
- Configuring your AWS CLI by passing in your AWS Access & Secret keys,
- Creating a new Anaconda (python3) environment, and pip installing the Amazon Braket SDK.
(ENV_QUANTUM) $ pip install amazon-braket-sdk
I found all the steps very easy to follow and encountered no issues. I did install the Amazon Braket SDK in to my (already existing) ENV_QUANTUM Anaconda environment that I was using for my Jupyter Notebooks.
We are also going to execute the following in to our ENV_QUANTUM python environment:
(ENV_QUANTUM) $ pip install qiskit-braket-providerand now we are ready to run a real job in Jupyter Notebook!
Running a Real Job
I made sure I completely restarted my Jupyter Notebook. Then I kept following the instructions and tried Step 6A – using the local simulator.
Next, I attempted to send a request to the 38-qubit Rigetti machine Aspen-11 with the following command:
> rigetti_task = rigetti.run(qc, shots=100)
Nothing happened.
So I checked my Amazon Braket account under Tasks, and sure enough, there was a new entry:
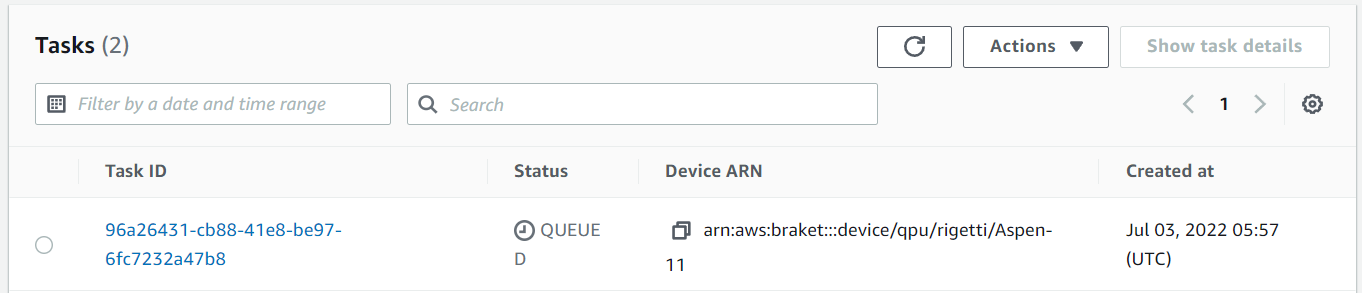
It is queued so I will have to wait about 8 hours.

Accessing my AWS S3 Buckets
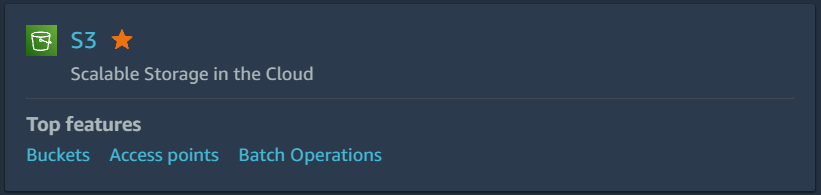
When you get your results back, they will be stored on your AWS account as S3 Buckets. You can view them by first adding the S3 service to your AWS account: type “S3” in the Services Search Bar:
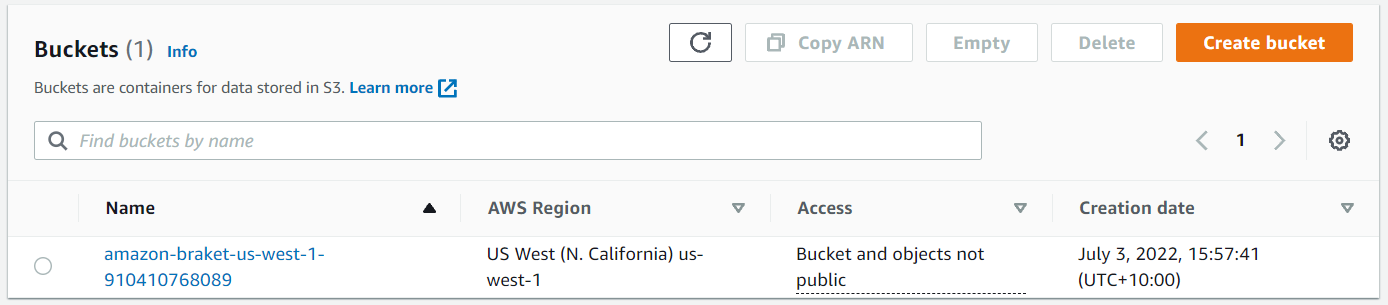
Then go to the Amazon S3 service and you should have a location-specific Amazon Bucket:
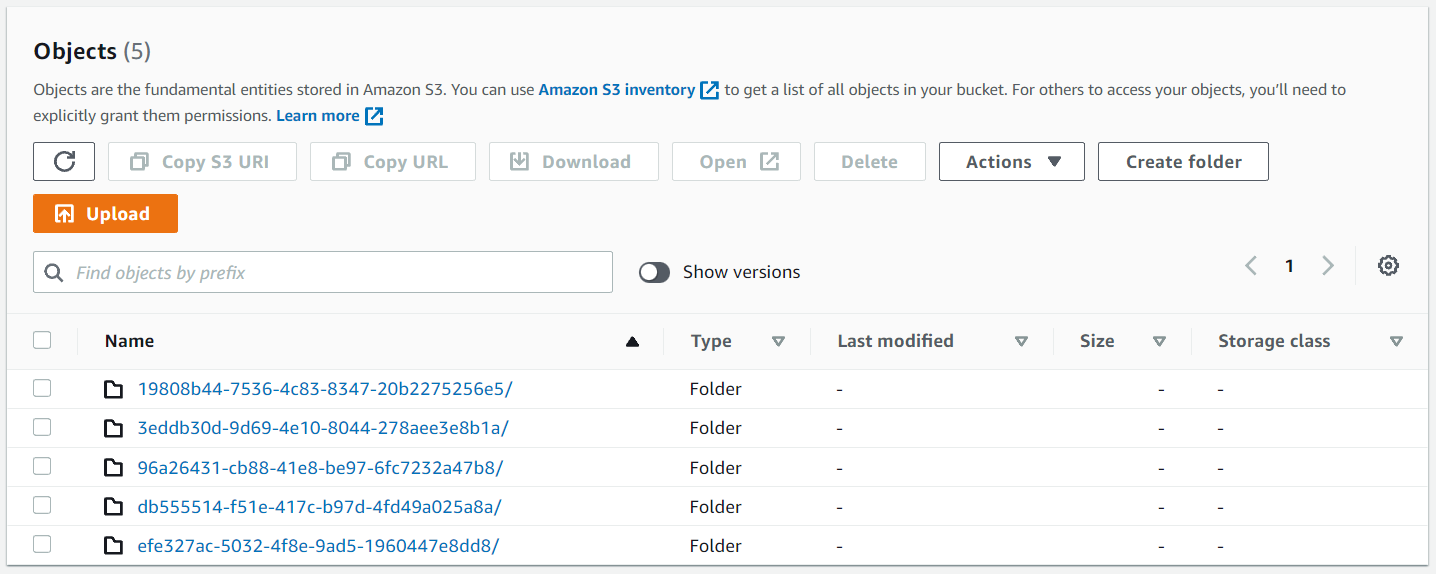
Quantum Jobs are stored under Tasks as S3 objects:
Clicking on one of these objects gives direct access the results:

Adding S3 Bucket Access
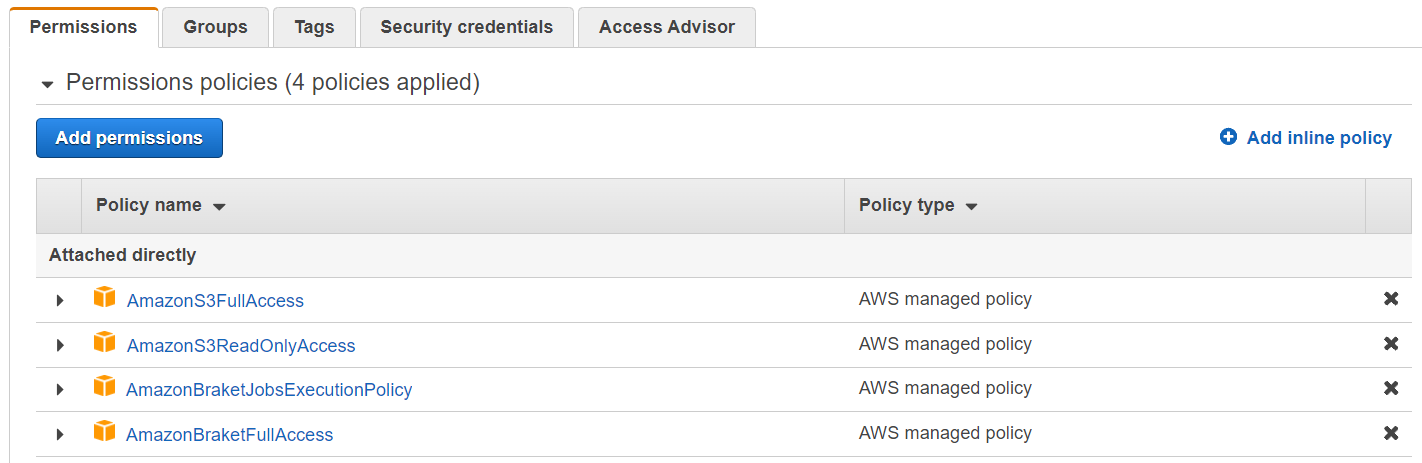
You can access these stored results programmatically from your Jupyter Notebook, but you have to give your AWS user account access to the S3 Bucket service:
When that is done, go back to your Anaconda command line and pip install boto3 in to your environment. Then restart your Jupyter Notebook.
In a notebook import boto3. Then create a new s3 resource with the following code:
> import boto3

> s3 = boto3.resource(
>     service_name = 's3',
>     region_name = 'us-west-1',
>     aws_access_key_id = '[your_access_key]',
>     aws_secret_access_key = '[your_secret_key]'
> )
Now you should be able to access your Amazon S3 Buckets:
> for bucket in s3.buckets.all():
>    print(bucket.name)
And, given a particular bucket name (from above), you can access all of your Amazon S3 bucket objects within:
> for obj in s3.Bucket('[your_amazon_bucket_name]').objects.all():
>     print(obj)

If you are having trouble getting this to work, I recommend the following blog: https://www.gormanalysis.com/blog/connecting-to-aws-s3-with-python/ written in 2020 by Ben Gorman.
Displaying our Quantum Results
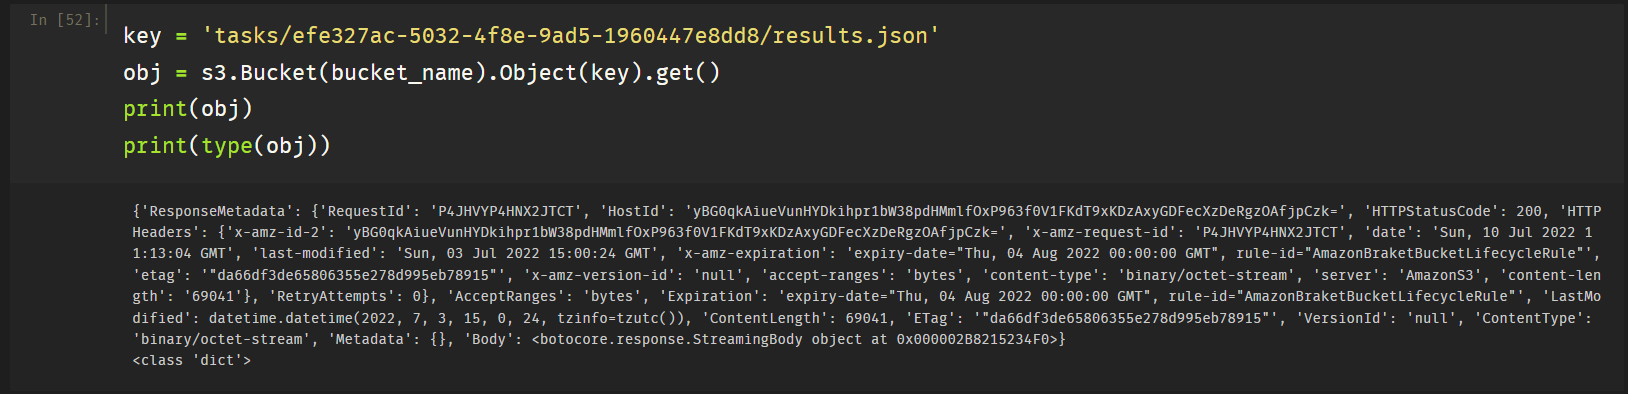
Now that we can access our quantum results using AWS S3 Buckets, let’s copy one of the bucket names from the previous step and assign it to the variable name key:
> key = 'tasks/efe327ac-5032-4f8e-9ad5-1960447e8dd8/results.json'
> obj = s3.Bucket(bucket_name).Object(key).get()
> print(obj)
> print(type(obj))
To read this file as a dictionary we need to import the Python json package to parse the data file, and then use the pandas package todisplay it as a readable dictionary.
> import json
> import pandas as pd

> raw_data = json.dumps(obj, default=str)
> data = json.loads(data)
> pd.DataFrame.from_dict(data)
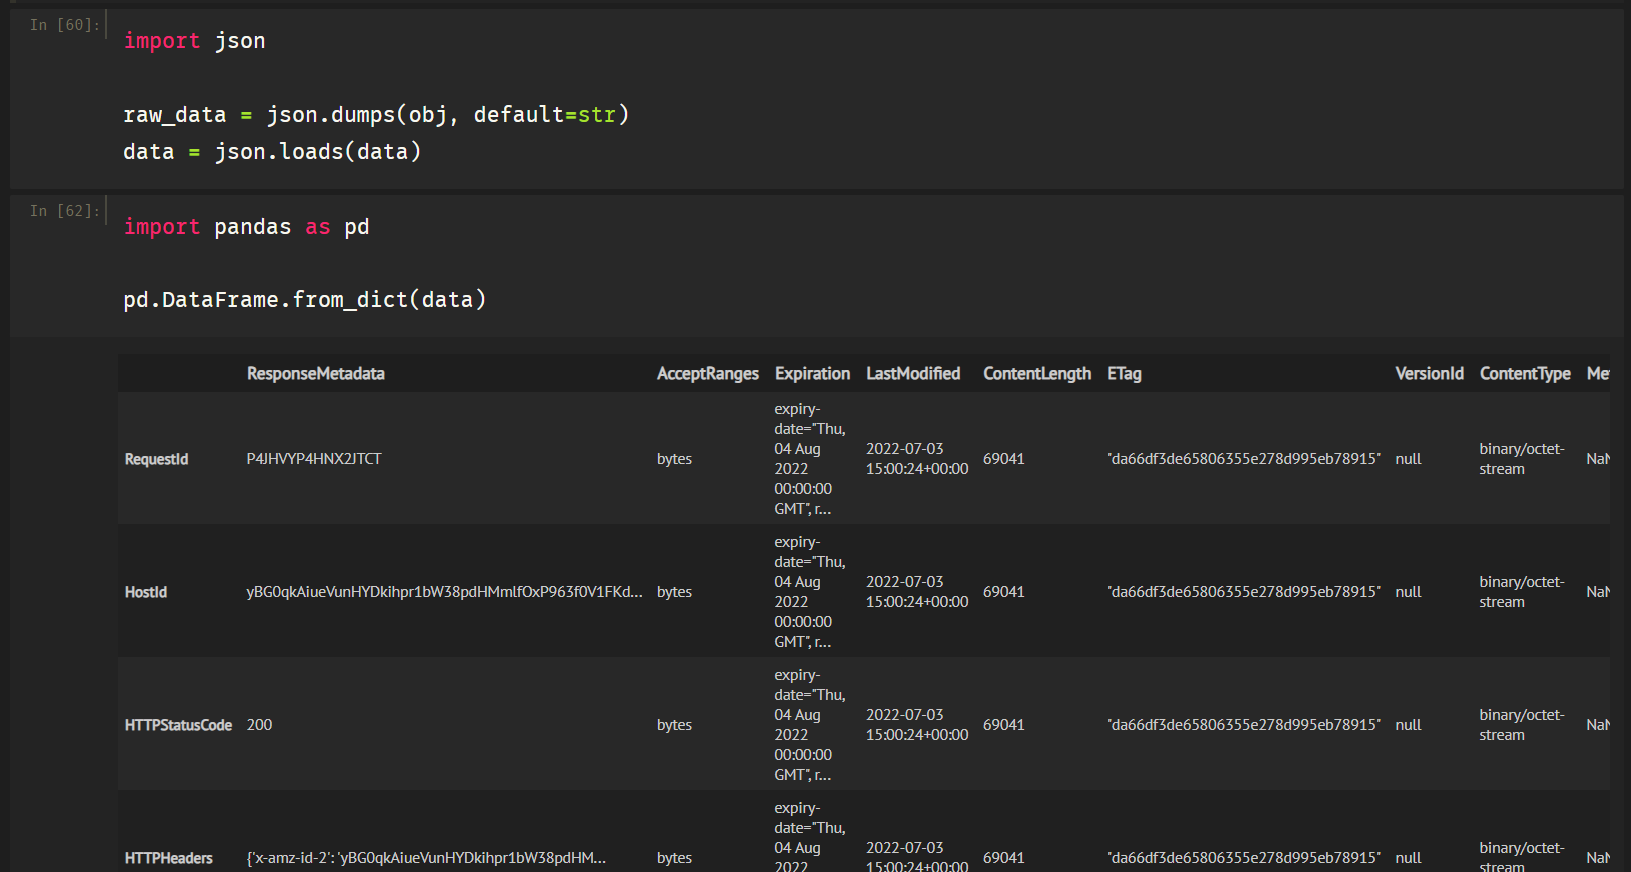
as
References
[2] https://www.gormanalysis.com/blog/connecting-to-aws-s3-with-python/ (by Ben Gorman)
[3] https://www.python.org/downloads/windows/
[4] https://www.anaconda.com/download#downloads
[6] https://qiskit.org/documentation/apidoc/visualization.html
