
Introduction
In the last article we created a Virtual Machine running Ubuntu. In this article we will cover the basics of installing Python, virtual environments and PyCharm.
Installing Python
Checking Version
First, let’s check if Python is already installed. A lot of Linux distributions come packaged with Python. To check, start by typing in the following to see what Python is already installed.
$ python3 --version
It should say that Python 3.6.x is already installed.
Now type in
$ lsb_release --version
to see what version of Ubuntu is installed. It should say something like Ubuntu 18.04.x LTS.
To check where Python is installed, type in
$ which python3
It should be installed under /usr/bin/python3. You can navigate to that location by typing in
$ cd /usr
Then type in
$ dir
Note that in here you have useful folders such as
- bin
- include
- lib
- libexec
- local
- src
We want to go in to the bin folder, so type in
$ cd /usr/bin
This is where most of your applications are installed.
To get back to your home directory type in
$ cd\
Installing Helpful Tools
Next we want to make sure our Linux system has all the tools it needs to build Python (or, at least, upgrade it). We can hit this all in one line by typing
$ sudo apt-get install -y make build-essential libssl-dev zlib1g-dev libbz2-dev libreadline-dev libsqlite3-dev wget curl llvm libncurses5-dev libncursesw5-dev xz-utils tk-dev
This will install a bunch of useful stuff. For me this took about 2 minutes.
At this point, if Ubuntu didn’t come with Python 3 already, you would install Python by typing in
$ sudo apt-get install python3.6
What About Python 2?
If you have Python 2 installed then
$ python
will launch the Python 2 interpreter, whilst
$ python3
will launch the Python 3 interpreter.
Installing pip
The Python package pip (which stands for Pip Installs Packages) is a package installer. Package management has now become so important that it is included with all Python3 installations, which makes it an essential tool for anyone using Python. For me, it is crucial for Python environments as you will need it to keep track of which packages have been installed, and more importantly, which ones have been uninstalled.
Before installing, you can verify if pip is already installed on your machine by checking its version:
$ pip3 --version
If it is not installed enter the following in to terminal to install it:
$ sudo apt install python3-pip
We will not be upgrading pip!
What is the Difference Between apt and apt-get?
aptis a subset of apt-get and apt-cache apt-cache commands providing necessary commands for package management. While apt-get won’t be deprecated, as a regular user, you should start using aptmore often.
Installing Python Virtual Environments
The next step is to install pipenv so that we can install dependencies and manage virtual environments (VE). A VE is a tool to keep the dependencies required by different projects in separate places, i.e. by creating virtual Python environments for them. As we will be dealing with very recent Quantum computing packages, installing and uninstalling them, we need to keep the environment separate. Furthermore, we certainly do not need our Quantum computing packages in other Python projects.
Type in the following
$ sudo apt install -y python3-venv
Creating Your First Python Environment
To store all of our environments we will be creating a new folder:
$ mkdir py_envs
$ cd py_envs
ls nts of your new virtual environment by typing
$ ls Quantum
I see that I have the following components:
- bin
- include
- lib
- share
- A config file
Activating Your First Virtual Environment
To active your virtual environment, type in:
$ source Quantum/bin/activate
You will notice the command line changes! You are now in a virtual Python environment within a Linux virtual machine!
To leave the Python virtual environment, simply type
(Quantum) $ deactivate
Checking Python Within a Virtual Environment
Once inside a Python virtual environment, type in the following to check the version of Python already installed there:
(Quantum) $ python3 --version
Check that apt-get is also installed
(Quantum) $ pip3 --version
Check which Python packages are installed with
(Quantum) $ pip3 list
When I did this I found that I only had the following installed in my virtual environment:
- pip v9.0.1
- setuptools v39.0.1
Time to get more Python stuff!
Installing Essential Python Packages Inside Your Virtual Environment
First up you should probably install (again) pipenv. Pipenv is a dependency manager for Python projects. While pip can install Python packages, it is recommended to use pipenv within a VE as it is a higher-level tool that simplifies dependency management for common use cases. Use pip to install pipenv inside our VE:
(Quantum) $ pip3 install pipenv
The first thing you should always do after installing pipenv in a VE is to install the requestslibrary which will also create a pipfile for you in your VE project directory. Run the following command:
(Quantum) $ pipenv install requests
Next, using pipenv install numpy and scipy.
(Quantum) $ pipenv install numpy
(Quantum) $ pipenv install scipy
You will notice that since we are using pipenv to install our packages, that only a version of numpy and scipy will be installed inside our virtual environment. To see this, first pip3 list the contents of the virtual environment and note that now you have all these installed:
- certifi
- numpy
- pip
- pipenv
- scipy
- setuptools
- virtualenv
Then deactivate the virtual machine and pip3 list the contents of the base Python3 installation. You will notice they are different.
Installing PyCharm
Now we will need a Graphical User Interface (GUI) to start building Python programs. Our choice of GUI here is the free community version of PyCharm. To install, open Firefox in Ubuntu and download PyCharm Community 2019.x.x from www.jetbrains.com/pycharm/downloads. Click the download button and choose to Save File. The file size and version at the time of writing was 343Mb and version 2019.2.1.
This will automatically download it to //Downloads . Note that the file is a tar.gz which is why we needed those system tools.
Once it downloads in Firefox, close Firefox and go back to Terminal.
Create a new folder where PyCharm will be installed:
$ mkdir opt
Change directory to your Downloads folder with:
$ cd Downloads
You can view the Downloads folder by typing in ll .
We now want to move the zipped PyCharm install file to the freshly created opt folder. To cut and paste (move) the file type in:
$ sudo mv pycharm-community-2019.2.1.tar.gz /opt/
Change directories to the /opt/ folder:
$ cd /opt/
To unzip the PyCharm file type in
$ sudo tar -xzvf /opt/pycharm-community-2019.2.1.tar.gz
Note that
x– extract files from an archivez– use gzip to do sov– use verbose modef– process the specified file
To save space, now remove the zipped file:
$ sudo rm pycharm-community-2019.2.1.tar.gz
Rename the clunky unzipped folder
$ sudo mv /opt/pycharm-community-2019.2.1 /opt/PyCharm
Create a symlink to Open PyCharm Easily
To create a symlink to open PyCharm easily type in
$ sudo su -c "ln -s /opt/PyCharm/bin/pycharm.sm /usr/local/bin/PyCharm"
Press enter. Now type in
$ PyCharm
anywhere and it will automatically open PyCharm,
Configuring PyCharm
The first thing PyCharm will ask you is to Import PyCharm Settings. Just click No and then OK.

Confirm that you have read and accepted the terms of the user agreement:

Choose a UI theme. I usually go with black:

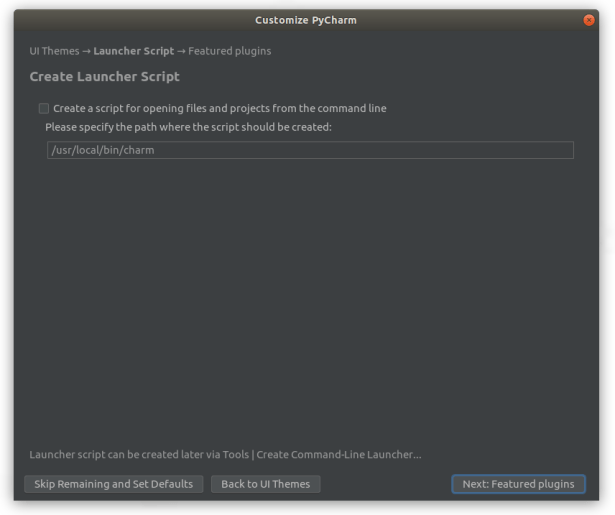
Under create launcher script just leave everything as default and do not create one.
Next you do not need to install any featured plugins. Just click Start.

Click Create a New Project.
Under Location click the little folder icon and browse to your /home/username/py_envs/Quantum/ folder and hit OK. Next, on the same screen, expand the project interpreter. Deselect New Environment and click Existing Interpreter. You want to select the one you already set up:
- Location:
/home/username/py_envs/Quantum/venv, - Base Interpreter:
/usr/bin/python3.6
Click the … button. On the left, choose a Virtualenv Environment and under Interpreter click the … button and browse to your virtual Python3 bin folder:
/home/username/py_envs/Quantum/bin/python3
Do not click make available to all projects. So it should look like this:

Click OK.
Back on the New Project screen, the interpreter should automatically populate with the correct version of a virtual environment Python3 installation – look, it’s even recognised the name of our virtual environment!

Click Create.
It might ask the following:

Just click Yes.
Virtual PyCharm
Now we are in a virtual PyCharm project.

Let’s see what we have here.
Expand the Quantum.bin folder. You should see exactly the same packages we installed earlier. This confirms that this is our virtual environment.
Expand the Quantum.lib folder. You should see Python3 installed.
Create a Python File
To create a Python file, left-click on the Root folder (in this case Quantum) and select New then Python File. Give it the name main and press Enter.
You are now ready to start programming.
Summary
In this article we installed Python3 and the Python package installer pip. Then we learned how to create virtual Python environments with venv. We then created a standalone version of Python3 inside our virtual environment.
Then we downloaded and installed PyCharm. We set up PyCharm so that it pointed to our virtual environment, and finally created a simple Python file within.
In the next article we will start to install more fun Python packages, namely, our first Quantum Programming package! We will then access that package through PyCharm and Compile our very first Quantum program.
