
In the last article we installed a specific version of Python inside our Python Virtual Environment (VE). Then we installed PyCharm and linked it to our Python VE. In this way, we could use PyCharm to create python programs that would be interpreted, compiled and run inside a VE, as opposed to outside a VE, say, under the root installation of Python where any old package could be installed.
For more on Python & Virtual Environments see this blog.
We want to restrict ourselves to a virtual Python environment because it is good practice to do so but also because we will be working with the latest (possibily unstable) versions of quantum programming libraries, so we may have to perform many installations, augmentations and swapping between environments.
For more on Switching Python Interpreters see the official blog here.
Your First PyCharm Program
Open a fresh instance of PyCharm by pressing Ctrl+Alt+T to open Terminal and type in $ PyCharm. If you haven’t symlinked it yet, I suggest you do by typing in
$ sudo su -c "ln -s /opt/PyCharm/bin/pycharm.sm /usr/local/bin/PyCharm"
Right-click on the root folder, click New and then Python File like so:
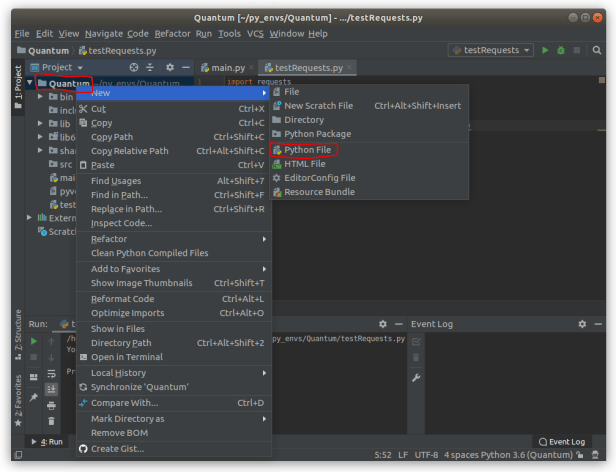
Name the file testRequests and double-click Python File again.
Open the file and type in the following
import requests

response = requests.get('https://httpbin.org./ip')

print('Your IP is {0}'.format(response.json()['origin']))
Hit Ctrl+S to Save.

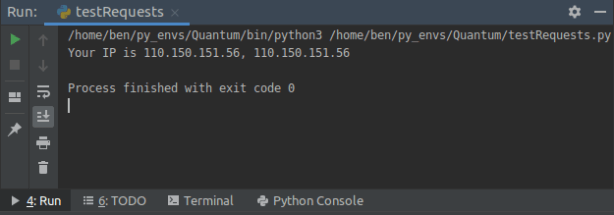
Press Alt+4 to open up the Output window.
Then hit Ctrl+Shift+F10 to run the file.
You should see this output:
Troubleshooting
The first time I tried this it didn’t work. I got the following error:
AttributeError: module 'requests' has no attribute 'get'
I’m not entirely sure how I fixed it. But I restarted the entire Virtual Machine and re-activated the Virtual Environment. Then re-opened PyCharm and it seemed to work.
Also, do not call your Python file the same name as the import name (e.g. requests.py) because I found that PyCharm kept trying to import itself instead of the library whenever requests was called.
The other thing to check is that testRequests is installed in to the correct location within your virtual environment. For example, in Terminal, I would first activate your VE with the source Quantum/bin/activate command, and pip list it to ensure requests is installed there.
Alternatively, in PyCharm itself, expand External Libraries, Python 3.6 (Virtual Environment Name) and python3.6 library root to check that it is installed correctly:

A third alternative is to hit Alt+F12 to open up the Terminal Window inside PyCharm and type in $ pip list to check that requests requests is installed there. Then type in python to open up the virtual Python interpreter from within PyCharm.

Then, when you get the >>> command line, type in the program contents line-by-line, pressing Enter at the end of each line, like so:

After hitting Enter Enter on the third line, you should get the desired response. Type quit() to exit the Python console from the Terminal window.
The same works in the PyCharm Python Console window:

The Debug Window
Press Alt+5 to open the Debug Window. Click the debugger button inside the Debug Window:

While this is article is not intended to be a tutorial on how to use Python, you can visit the official website here on how to use the debugger, which I find useful for setting variable watches and breakpoints.
Summary
In this article we
- downloaded and installed the requests Python library in to our Python Virtual Environment,
- verified its installation via three methods:
- pip3 list
- PyCharm External Libraries
- Importing through PyCharm Python Console & Terminal
- created a simple test program that imports the requests library and runs a simple piece of code.
We also got ourselves familiar with the Run, Terminal, Python Console and Debug windows inside PyCharm which will become very useful later on.
