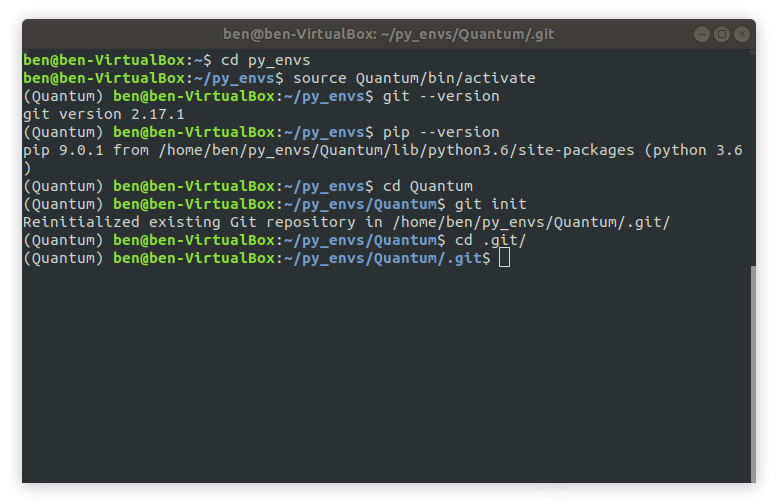
Go back to Terminal and let’s get our quantum virtual environment back up and running. We always start by updating the package manager just in case it has gone out-of-date between virtual machine uses, type:
$ sudo apt update && sudo apt upgrade
$ cd py_envs
and activate the Quantum virtual environment with
$ source Quantum/bin/activate
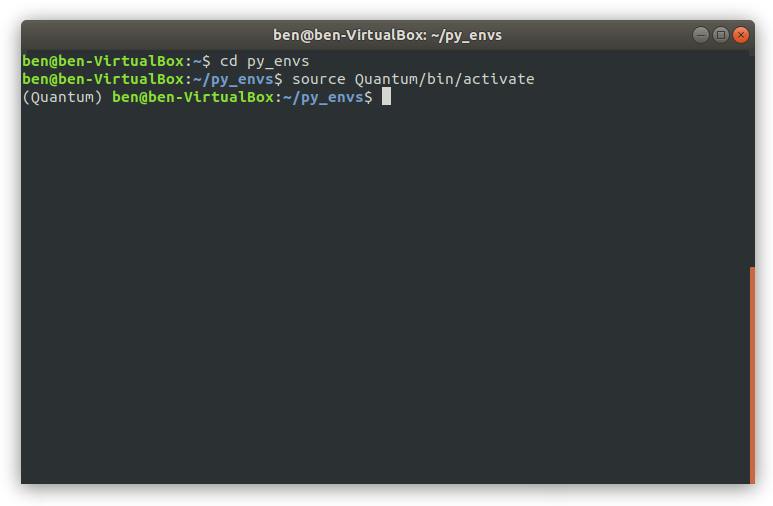
Note the command line now begins with (Quantum).
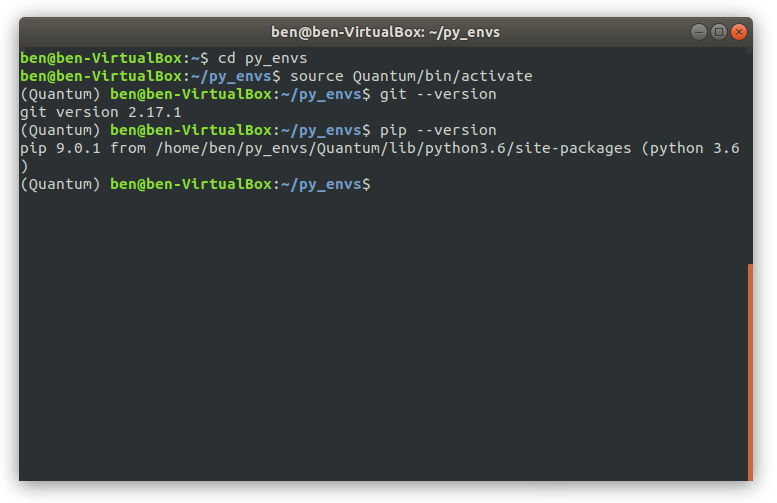
Verfiy we still have Git and Pip running by typing the following commands
(Quantum) $ git --version
(Quantum) $ pip --version
Re-initialise our Git Repository (repo) in the Quantum virtual environment by first changing directories, and then initialising with these commands:
(Quantum) $ cd Quantum(Quantum) $ git init
This will re-initialise our .git folder inside the Quantum virtual environment folder structure. Change directory to this folder to view the basic skeleton structure of an empty Git Repo:
(Quantum) $ cd .git/
Remind ourselves of our requirements package by opening it and scrolling down to our Qiskit libraries:
(Quantum) $ nano requirements.txt
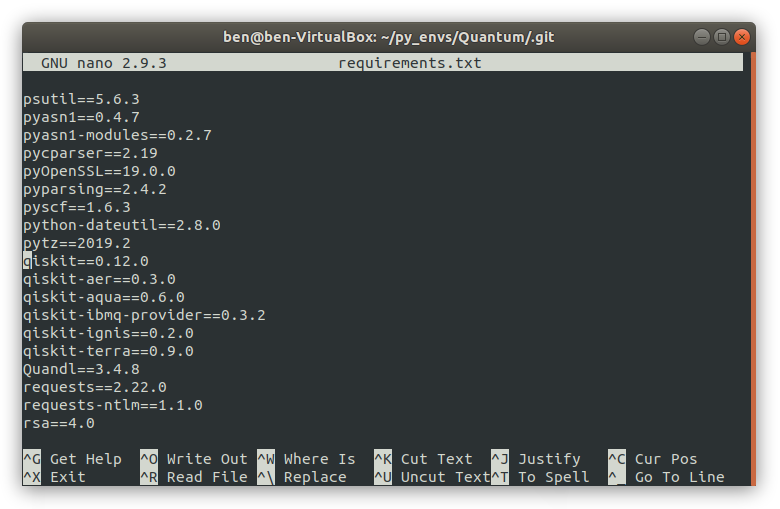
ctrl+x to quit nano.
Go back one directory with cd .. and check the status of git with
(Quantum) :~/py_envs/Quantum$ nano requirements.txt
Then ctrl+X to exit nano.
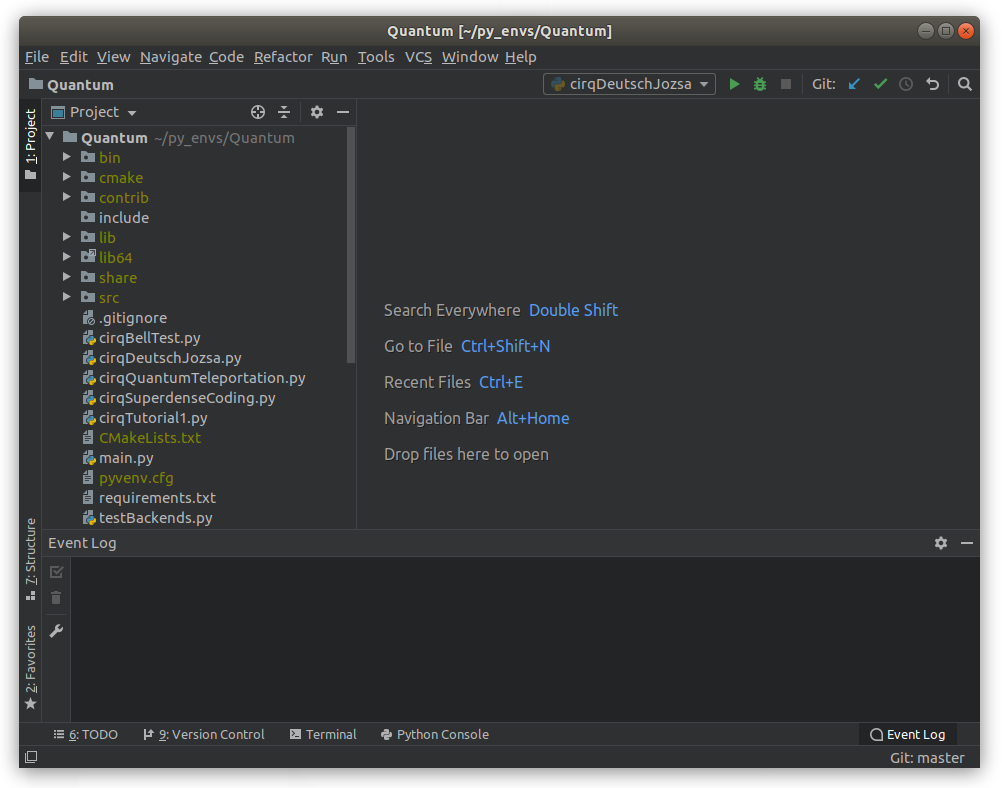
PyCharm
You should already have PyCharm linked to the command
(Quantum) :~/py_envs/Quantum$ PyCharm
You will notice that since we ran than command from within our virtual environment, PyCharm will open up in the correct state, and already showing us where we were last time on superdense coding:
Updating Python
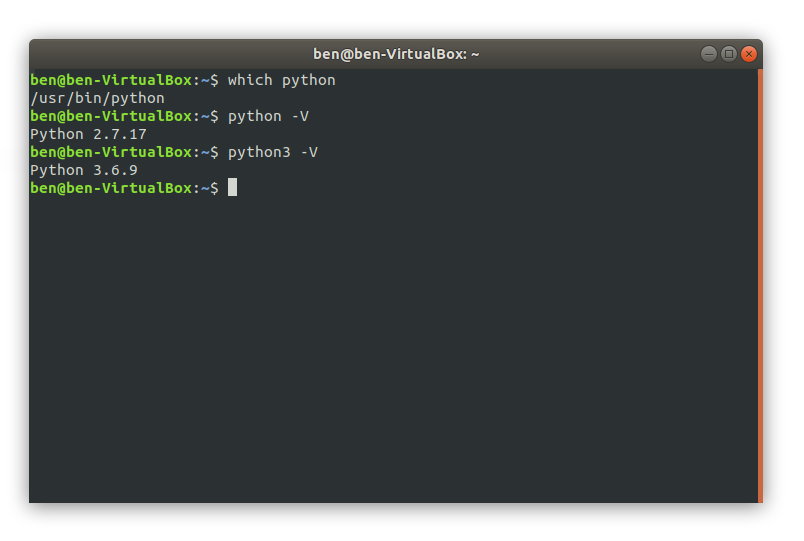
OK, now before we can update Qiskit we will need to update our python. Currently we have been running with base Python 2.7 (which is OK, that’s what comes packaged with Ubuntu), and we also have Python 3.6.9 installed:
Ensure you are not in any virtual python environments, and install Python 3.7 with the command
$ sudo apt-get install python3.7
and we finish this section by quickly verifying what version of pip3 we have installed with the command
$ pip3 -V
as at the time of writing, I currently have pip version 19.2.3. We will not be upgrading pip!
Creating a New Python 3.7 Virtual Environment
Install the new Python 3.7 virtual environment manager with the command:
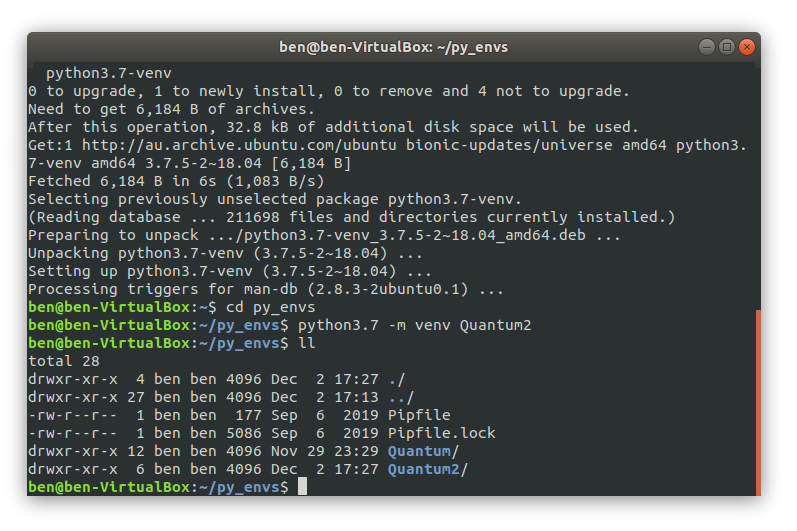
$ sudo apt install -y python3.7-venv
Change directory to your Python Environments folder:
$ cd py_envs
Once navigated to the folder type in the folowing command to create a brand new Python 3.7 virtual environment:
$ python3.7 -m venv Quantum2
I already have a Python 3.6 virtual environment called Quantum so I had to call this one Quantum2, but you can call your whatever you want.
Do a quick list directory here to see that your new Python 3.7 virtual environment has been created:
Activating the Python 3.7 Virtual Environment
Activate the Python 3.7 virtual environment with the command:
~/py_envs$ source Quantum2/bin/activate
and your command line prompt should change to indicate that it has loaded:
(Quantum2)~/py_envs$
Checking the Default Python in this Environment
Now you want to check and make sure that the default Python is the version 3.7 that you want. Do this by checking with the command:
(Quantum2)~/py_envs$ python -V
you should get:
Python 3.7.5
which means you are now running Python 3.7, even though your base system is still running Python 2.
Check which pip is also installed:
(Quantum2)~/py_envs$ pip3 --version
pip 9.0.1
OK, so Python 3.7 is running pip 20.0.
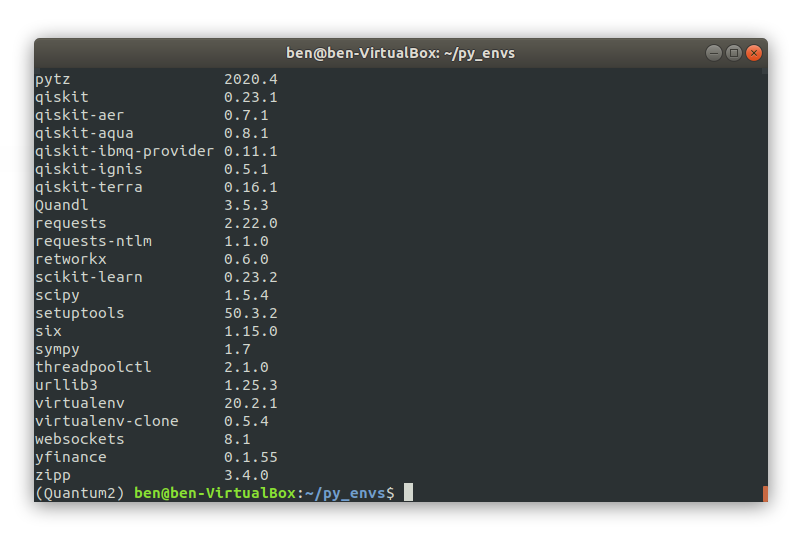
Check which Python packages are installed with
(Quantum2) $ pip3 list
When I did this I found that I only had the following installed in my virtual environment:
- pip v20.0.1
- setuptools v39.0.1
Time to get more Python stuff!
Installing Essential Python Packages Inside Your Virtual Environment
First up you should probably install pipenv. Pipenv is a dependency manager for Python projects. While pip can install Python packages, it is recommended to use pipenv within a VE as it is a higher-level tool that simplifies dependency management for common use cases. Use pip to install pipenv inside our VE:
(Quantum2) $ pip3 install pipenv
The first thing you should always do after installing pipenv in a VE is to install the requestslibrary which will also create a pipfile for you in your VE project directory. Run the following command:
(Quantum2) $ pipenv install requests
Next, using pipenv install numpy and scipy.
(Quantum2) $ pipenv install numpy
(Quantum2) $ pipenv install scipy
You will notice that since we are using pipenv to install our packages, that only a version of numpy and scipy will be installed inside our virtual environment.
Installing Qiskit
Now that we have updated Python to v3.7 let us now update Qiskit to its latest version (which needs Python 3.7).
(Quantum2) :~/py_envs/Quantum2$ pipenv install qiskit
But this resulted in a massive failure:

I’m not quite sure what happened there. Let’s try pip to install it.
The Python.h and Psutils Error
Ugh! Now I’m getting this error:
fatal error: Python.h: No such file or directory
This error means that there is no Python development package installed in your system, which is required to compile those Qiskit Python packages. For default Python3 package you can install development package using following command:
(Quantum2) :~/py_envs/$ sudo apt-get install python3.7-dev
This command will install Python3 development package from Ubuntu default repo
(Quantum2) :~/py_envs/$ pip install qiskit
OK, that worked! Looks like all I had to do was install the Python 3.7 development package! A quick pip list reveals that qiskit v0.23 is installed:
Qiskit Visualization
Since v0.9 it looks like Qiskit now has a visualization package. Let’s install that too
(Quantum2) :~/py_envs/$ pip install 'qiskit[visualization]'
Configuring PyCharm
Load PyCharm.
Go to File > New Project. In the Location area, click on the browse folder location button and browse to the Quantum2 folder you just created:
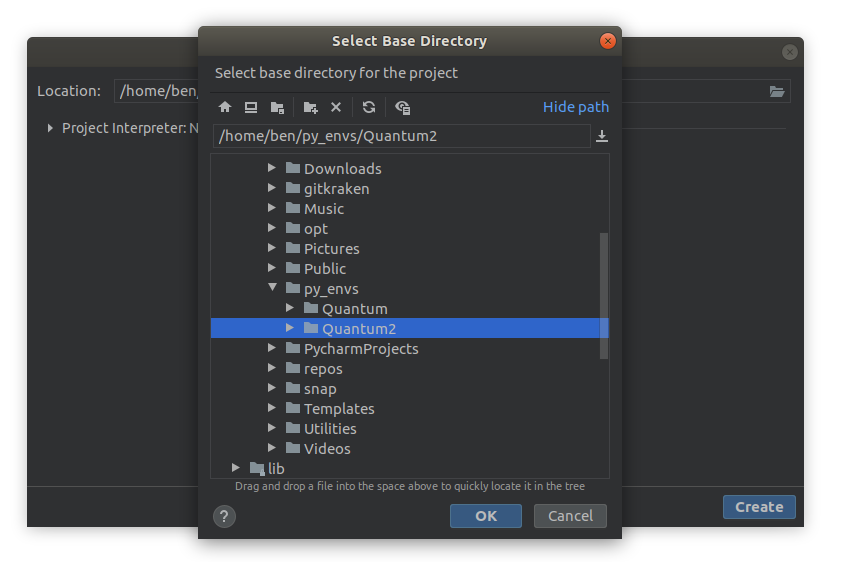
Just click-select that folder, you don’t need to drill in to it. Click OK.
Expand the Project Interpreter. We want to use an Existing Interpreter. So click that radio button.
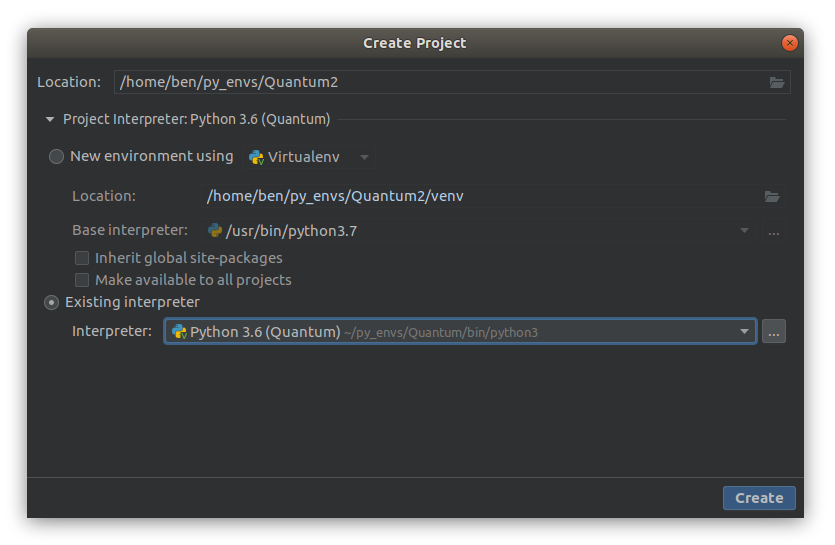
If our Python 3.7 (Quantum2) environment does show up immediately in the drop down box, go ahead and click on the ellipsis button. In the pop-up Add Python Interpreter window, choose Virtualenv Environment:
The Python 3.7 Quantum2 environment needs to be navigated to manually – don’t let it autodetect!. Navigate to the path below with the browse button. Click OK once your have the folder containing the executible selected:
/home/[username]/py_envs/Quantum2/bin/python3.7
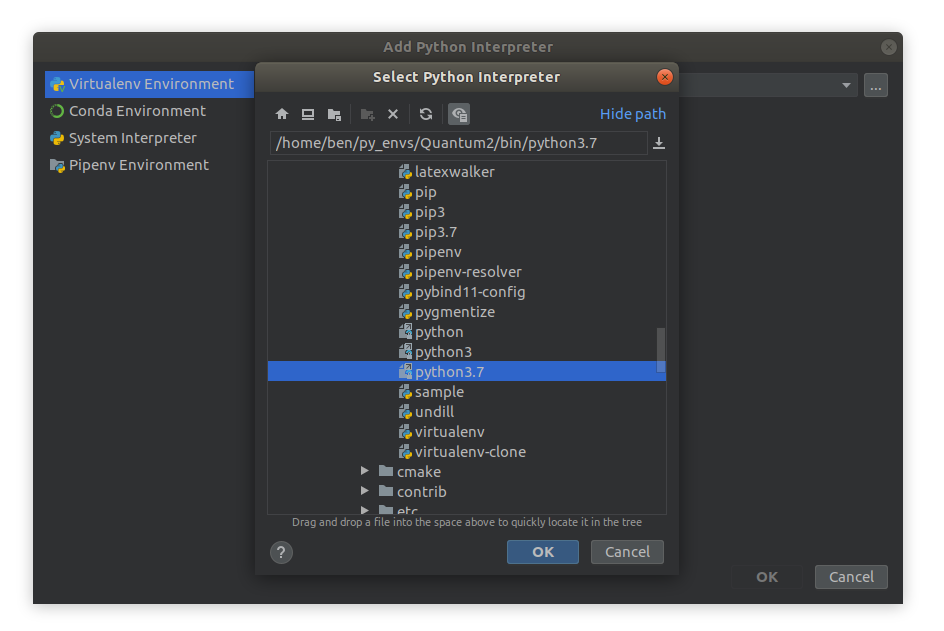
Click OK.
Your Project Creation setup should look like this (make sure the Project location is in ~/py_envs/Quantum2/:
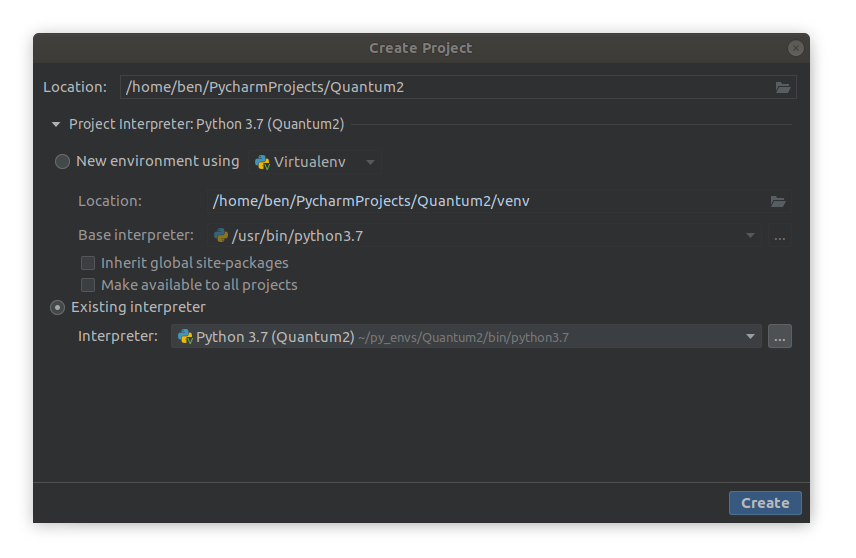
Click Create.
Wait while PyCharm indexes everything and then updates skeletons.
Checking your Qiskit Version
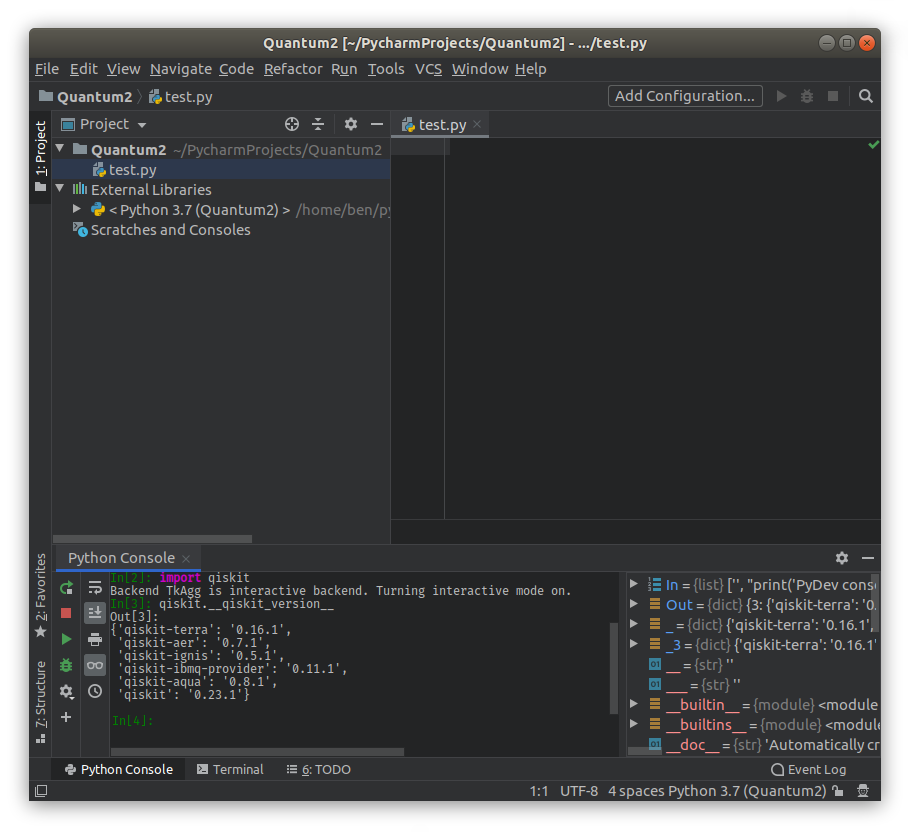
Since the Qiskit package includes a wide range of different elements, simply printing the version by running qiskit.__version__ can be misleading as it returns only the version for the qiskit-terra package. This is because the qiskit namespace in Python doesn’t come from the Qiskit package, but instead is part of the qiskit-terra package. To see the versions of all the Qiskit elements in your environment you can use the __qiskit_version__ attribute. For example, running the following command will return a dictionary that includes the versions for each of the installed Qiskit packages.
>>> import qiskit
>>> qiskit.__qiskit_version__
Link PyCharm to IBM Q Experience
Go to your IBM Q Experience account and copy your API token to the clipboard. Then go in to PyCharm, open up the Python Console and type in
>>> from qiskit import IBMQ
>>> IBMQ.save_account('[copy IBMQ API token here]')
Your credentials will be saved and you should now be able to send and receive requests to and from the IBM Q Experience machines.
Link PyCharm to GitHub
Change directory to our new Python 3.7 virtual environment, and type in:
(Quantum2) :~/py_envs/Quantum2$ git init
Check a new Git Repository (repo) has been initialised by listing the contents of the directory and looking for a .git/ folder.
Open up PyCharm.
In File > Settings > Version Control > GitHub, click Add account.
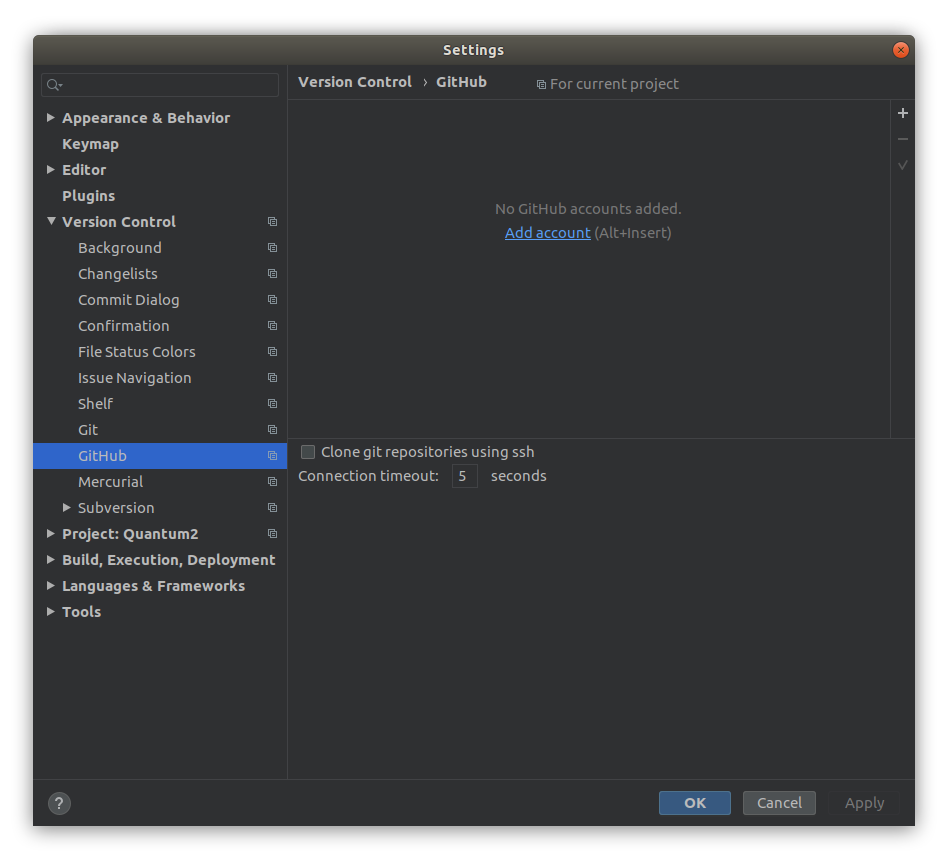
Now you will need to generate an access token. Use your browser to log in to your GitHub account, go to your personal details icon in the top right corner, click Settings then Developer Settings, and then Personal Access Tokens. Generate a new token.
Your PyCharm should now be connected to your GitHub account
Next Steps
You can follow the instructions and tutorials from Qiskit here now if you want to test a few more things:
https://qiskit.org/documentation/getting_started.html
References
[1] https://qiskit.org/documentation/getting_started.html
[2] https://www.youtube.com/watch?v=yHpAxdBt3Rc&ab_channel=WestonGanger
[3] https://www.youtube.com/watch?v=M4EkW4VwhcI&ab_channel=Qiskit&t=367s
