
Introduction
In this article we are going to take a little break from writing quantum algorithms to spend some much needed time on our coding setup.
Installing Git
Open Oracle VM VirtualBox and start your Quantum Virtual Machine. Once it has loaded, press Ctrl+Alt+T to open up terminal. Open Firefox briefly to ensure that you have access to the internet.
In Terminal, start by updating the package manager just in case it has gone out-of-date between virtual machine uses, type:
$ sudo apt update
Now run the following command to install Git
$ sudo apt install git
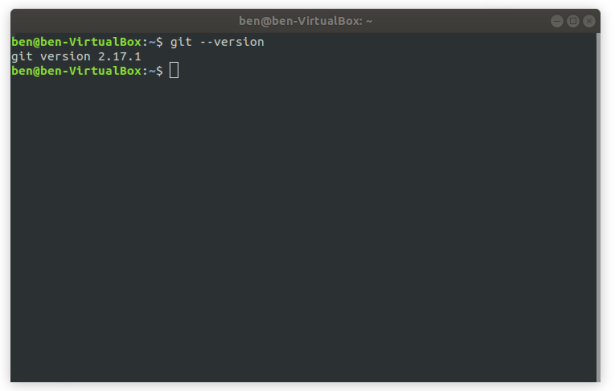
Verfiy the installation by typing the following command
$ git --version
Using Git with your Python Source Files
Now go to your Python environments folder
$ cd py_envs
and activate the Quantum virtual environment with
$ source Quantum/bin/activate
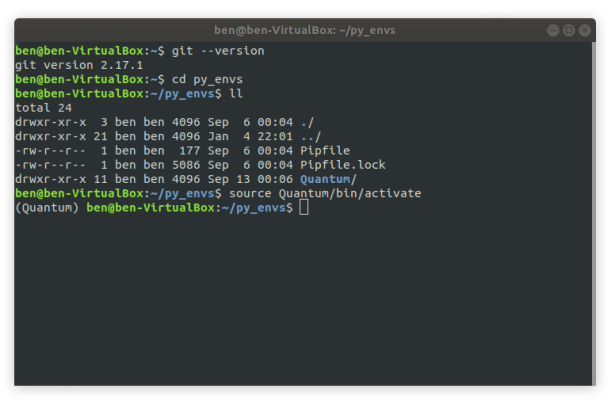
Check that git is recognised from within the virtual environment with the following command:
(Quantum) $ git --version
Check to ensure that pip is working from within the virtual environment with the following command:
(Quantum) $ pip --version
Initialise an empty Git Repository (repo) in the Quantum virtual environment by first changing directories
(Quantum) $ cd Quantum
(Quantum) $ git init
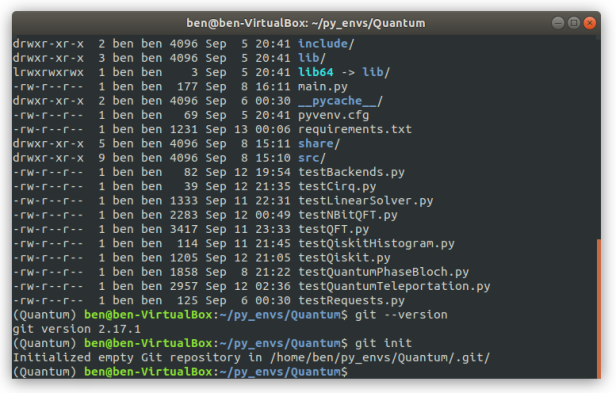
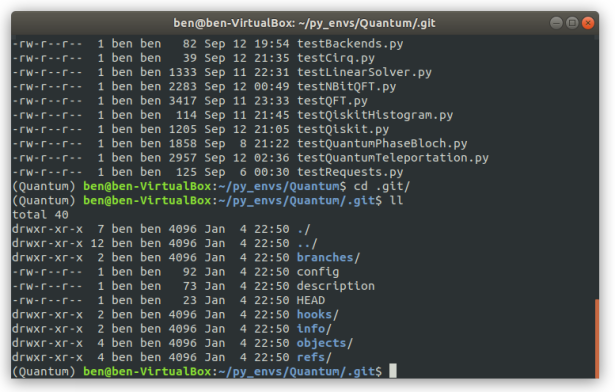
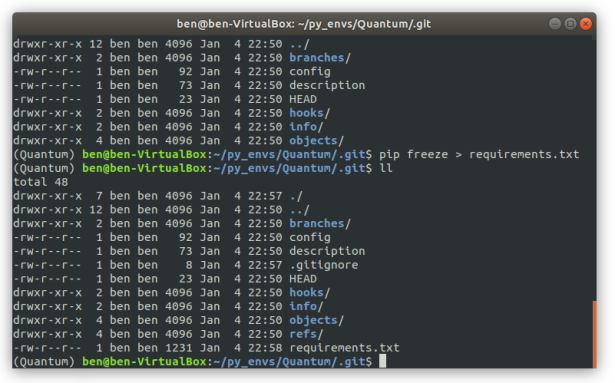
This will place a .git folder inside the Quantum virtual environment folder structure. Change directory to this folder to view the basic skeleton structure of an empty Git Repo:
(Quantum) $ cd .git/
We now need to add the Quantum VE to the gitignore
(Quantum) $ echo 'Quantum' > .gitignore
This keeps the virtual environment out of source control.
Creating a Dependency File
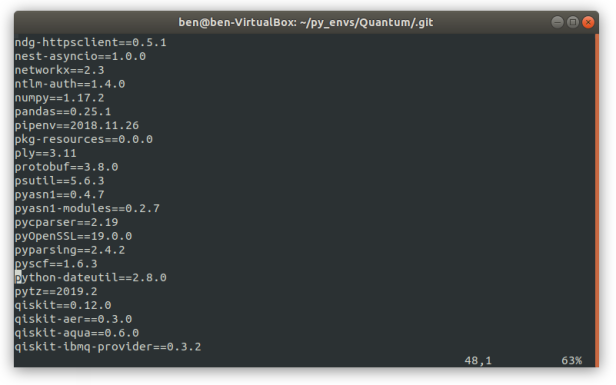
Now type in the following to create a dependency file:
(Quantum) $ pip freeze > requirements.txt
This will also create a new text file inside the ~/py_envs/Quantum/.git folder.
If you have vim installed, you can view the text file in Terminal with either
(Quantum) $ vim requirements.txt

(Quantum) $ nano requirements.txt
Close the text editor and go back one directory to the Quantum VE folder. Type in
(Quantum) :~/py_envs/Quantum$ git status
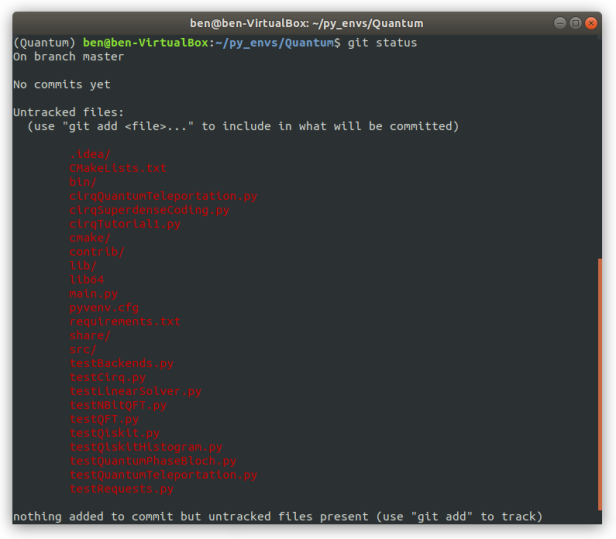
This is correctly showing the list of Python source files that it is keeping track of!
Let’s add our pip requirements (dependencies) file to this repo with the command:
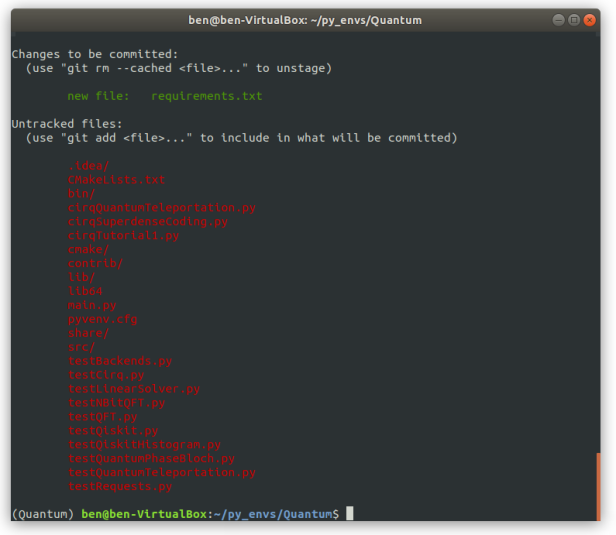
(Quantum) $ git add requirements.txt
Then
(Quantum) $ git status
We can force Git to track all of our files by typing in
(Quantum) $ git add .

(Quantum) $ git status
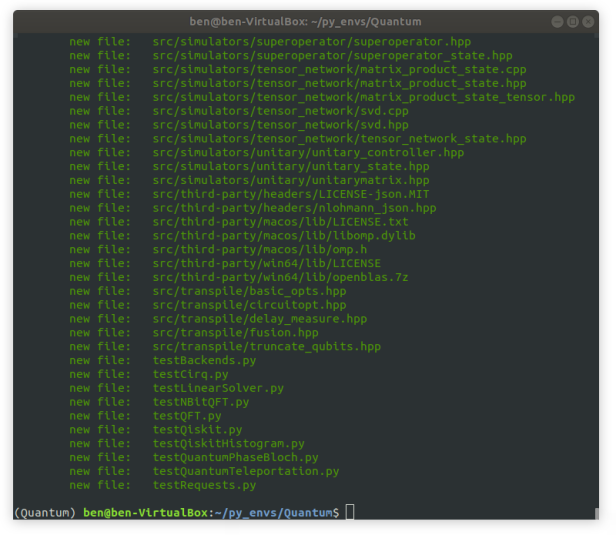
This won’t work, because now git wants to track all the files in the VE, including Python’s site packages! According to my environment, that is over 19,000 files!
Git Reset
To reset the Git state, type in:
(Quantum) $ git reset
(Quantum) $ git status
To check that it has un-added all the files.
Let us check in the files we need one-by-one.
(Quantum) $ git add requirements.txt

(Quantum) $ git status
It shows the requirements text file as a change to be committed.
Git Commit
Go to www.github.com and sign in. Remember your email address.
Go back to Terminal and type in
(Quantum) $ git config --global user.email "test@email.com"

(Quantum) $ git config --global user.name "yourname"
Now you can commit your changes with:
(Quantum) $ git commit
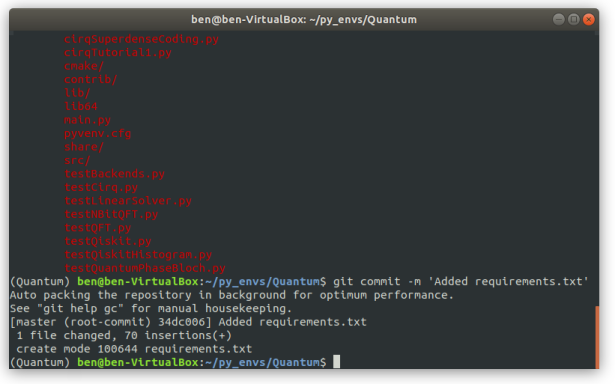
Let us commit this file with a message:
(Quantum) $ git commit -m 'Added requirements.txt'
Git Log
We can also view this change in the Git log by typing in:
(Quantum) $ git log
Note that the commit status is (HEAD -> master). This means that our changes are still in our local environment. So now we need to push it to our GitHub repository…
Creating a GitHub Repository
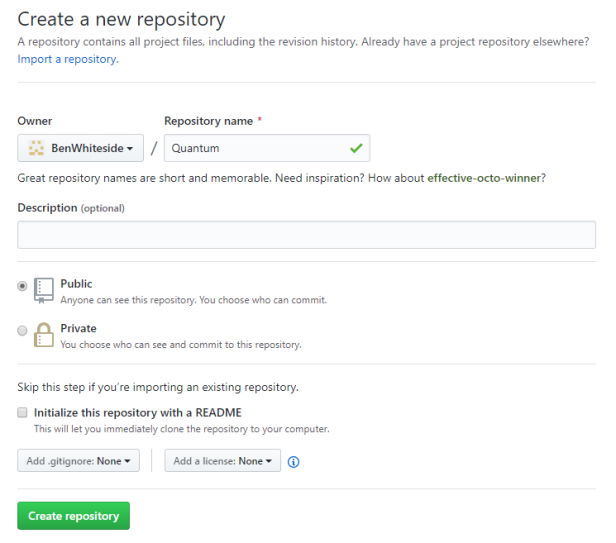
Go to www.github.com. Sign in using the same email address that you used above to configure your Git repo. On the right hand side, click the + button and add a new repository. Give the repository a name (I call it the same name as the virtual environment). Leave the description blank, set it to public and tick initialise with a README. Don’t add any ignores or licences at this stage, click Create Repository.
At the top of the new GitHub repository <> Code page (the default landing page after creation), find the Quick Setup area and note the HTTPS URL. It should say something like:
https://github.com/[YourNameHere]/Quantum.git
Note that your name and your repo name in the above URL should match exactly the git config name and virtual environment.
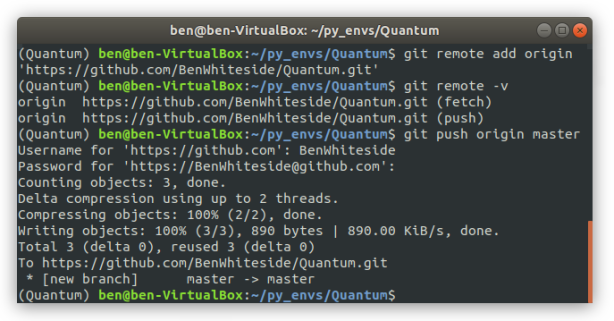
Now add the URL for the repository by typing in
(Quantum) $ git remote add origin 'https://github.com/[YourNameHere]/Quantum.git'
Verfiy the new remote by typing
(Quantum) $ git remote -v
Push Commits to GitHub from Quantum Virtual Environment
The push commits to GitHub from the Quantum Virtual Environment simply type in
(Quantum) $ git push origin master
And enter your GitHub repo account name and password.
Go back to GitHub website and hit Refresh on your browser.
There should be a new file there called Requirements.txt.
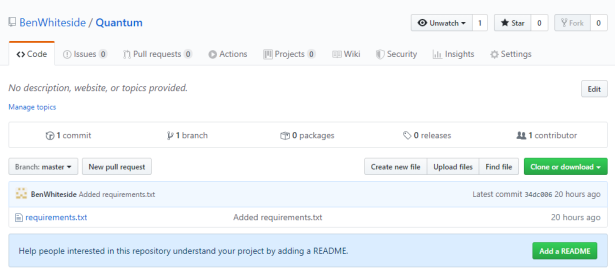
There we have it, we have successfully committed our first file from our Linux/Ubuntu virtual machine in to our remote GitHub repository.
Linking PyCharm to Git
Go back to your Terminal which is already in the Quantum VE and open PyCharm
(Quantum) $ PyCharm
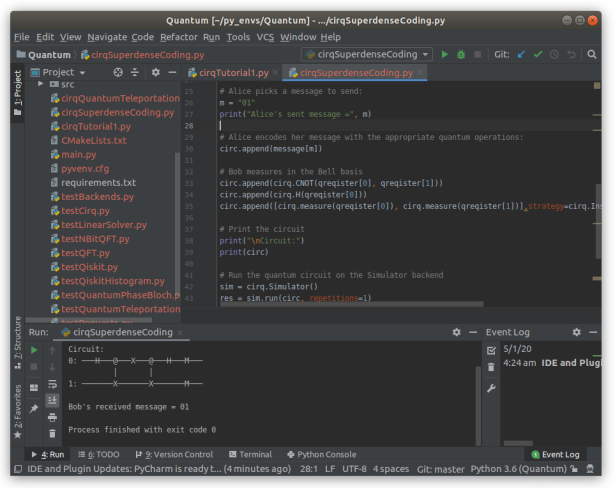
When it loads, give it a minute to index (wait for the bar down the bottom to go to 100%). The first thing you should notice is that it has recognised that the virtual environment has a Git repo running in it, because all source code files should be red with the exception of the requirements.txt file:
To get a Python file in to your GitHub follow these steps:
- Type
(Quantum) $ git add [FileName].py - Type
(Quantum) $ git commit -m 'Added [FileName] to GitHub' - Type
(Quantum) $ git push origin master - Watch as
[FileName]turns from red to white in PyCharm. - Watch as a new file is added to GitKraken or GitHub.
Getting the .gitignore File Just Right
OK, so everything was going well at this point, however it was annoying to have to go through each Python file in my project one-by-one and git add/commit/push each one. It would be nice if I could just go
(Quantum) $ git add .
and add all my Python files.
Also, PyCharm was still showing several subfolder as red, which meant that if I did a git-add-all command, thousands and thousands of files would get added to the git head.
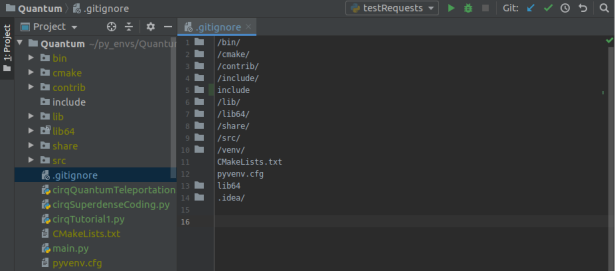
So I created a .gitignore file in my Project folder. It appeared in PyCharm along with my other Python files. I opened it with PyCharm and edited the blank file. I made it look like this:
At this point I noticed that PyCharm’s Version Control pane down the bottom was useful (Alt+9 to open). It immediately showed that my .gitignore file was changed and was glowing blue. So I right-clicked it and clicked Commit, filled out the form, and click Commit.
Now my .gitignore file was up on GitHub.
Suddenly all my important files in PyCharm were green and the ones I didn’t on GitHub were greyed out.
Gitignore.io
Alternatively you can go to www.gitignore.io and enter PyCharm, Python and venv in to the Create bar.
Committing Multiple Files to Git
Now that I had my .gitignore file sorted out I was free to go back to the Terminal and use
(Quantum) $ git add .
Alternatively, I could use PyCharm’s VSC interface to commit multiple files by clicking on the VCS menu in the ribbon and clicking Commit (Ctrl+K). In the Commit Changes window that pops up I can see 12 green python files with tick-boxes (this is much better than the list of 19,000 files I had before I sorted out my .gitignore file).
I ticked all them and entered a message: “First bulk commit”. Then I clicked Commit.
Now that I have committed everything that isn’t in my .gitignore list, when I type
(Quantum) $ git status
in Terminal it says
On branch master nothing to commit, working tree clean
Pushing Multiple Files to Git
You can also push from PyCharm by going VCS > Git > Push or holding (Ctrl+Shift+K). In the Push Commits window that pops up click Push. Enter your GitHub username and password and click Push. You should get a message saying that several files have been successfully pushed to GitHub.
Back in PyCharm everything is back to White, this is what a clean working tree looks like:

Meanwhile, over in GitKraken land…
GitKraken
Open GitKraken. Click Sign-in with GitHub. Once it is logged in, click Open a repo. In this view of your repo
Glo
Click Create New Glo Board. Enter a board name (E.g. QuantumComputing) andenter a board group (E.g. My Boards). Click the green Connect to GitHub button in the bottom left-hand corner.
Click Create Board.
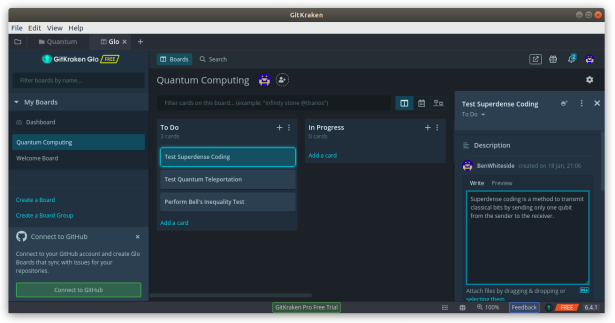
Now click and create three new columns: “To Do”, “In Progress” and “Completed”.

Now let’s add a card in the To Do column called “Test Superdense Coding”, then let’s create two more there called “Test Quantum Teleportation” and “Perform Bell’s Inequality Test”.
We can click on the “Test Superdense Coding” card and fill out some of its properties on the right hand side:
TO BE COMPLETED
Summary
TO BE COMPLETED
Troubleshooting
My Virtual Machine Has No Internet Connection
There was a point where I opened up my Virtual Machine only to find that it suddenly did not have internet connection.
First I checked that Devices > Network > Network Settings > Adapter 1 was enabled and attached to NAT. But, of course, it was because I had changed nothing and it was working the last time I used the machine.
I tried shutting down the machine and rebooting it and that seemed to work.
See here for more information.
Could Not Get Lock Error
I was trying to install Git in to my virtual machine but kept getting the
E: Could not get lock /var/lib/dpkg/lock-frontend - open (11: Resource temporarily unavailable)
E: Unable to acquire the dpkg frontend lock (/var/lib/dpkg/lock-frontend), is another process using it?
After trying a few things I found this question asked here which tells me to execute the following commands one-by-one in Terminal:
$ sudo killall apt apt-get
$ sudo rm /var/lib/apt/lists/lock

$ sudo rm /var/cache/apt/archives/lock

$ sudo rm /var/lib/dpkg/lock*

$ sudo dpkg --configure -a

$ sudo apt update
After this, I ran $ sudo apt install git and it worked.
See here for more information to this problem.
References
- How to Install Git on Ubuntu 18.04.
- Adding an existing project to GitHub using the command line.
- Pip, venv and git: Example tutorial and basic project initialization.
- Best practice for virtualenv and git repo.
- The right way to use virtual environments.
