
Introduction
In the previous post we unpacked, bootstrapped and built both Boost and QuantLib for Visual Studio 2017. Now we will show how to use it!
In addition, this post will cover the issues and errors that I encountered when I first attempted this. We will look at how to correctly declare and instantiate objects and variable types by peeking at their class headers.
Creating the Test Project
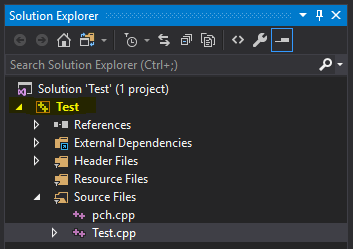
Begin by opening up Visual Studio 2017 and create a New Project. Under Visual C++ create a new Windows Console Application. I called mine ‘Test”. Click OK. Once the Solution opens up you will notice two files: “pch.cpp” and “Test.cpp”. Ignore pch.cpp, that’s just for PreCompiled Headers, you’ll be doing your programming in Test.cpp.
Before we start you will need to include the QuantLib libraries. You will not need to include the Boost libraries due to the nature of how we installed it. To see this, right-click on the Test project in the Solution Explorer.
and click Properties (right down the bottom), or simply click on Test and then hold Alt+Enter.
Under Configuration Properties > VC++ Directories you should notice that Boost has included itself already! If Boost is not showing up here, you will need to attempt to re-install Boost by following the instructions in the previous post.

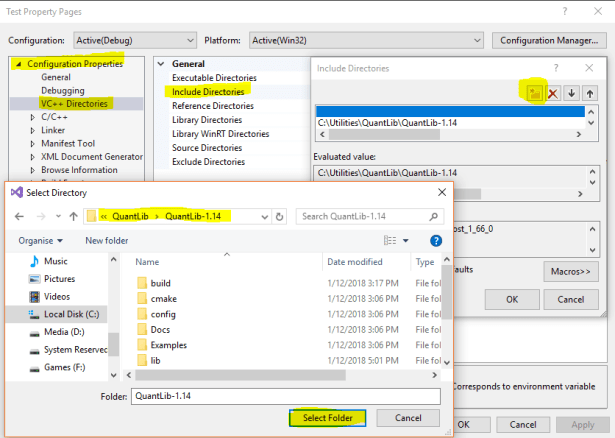
To include QuantLib click on Include Directories then click the Plus Folder button and navigate the browser to the Root QuantLib Directory:
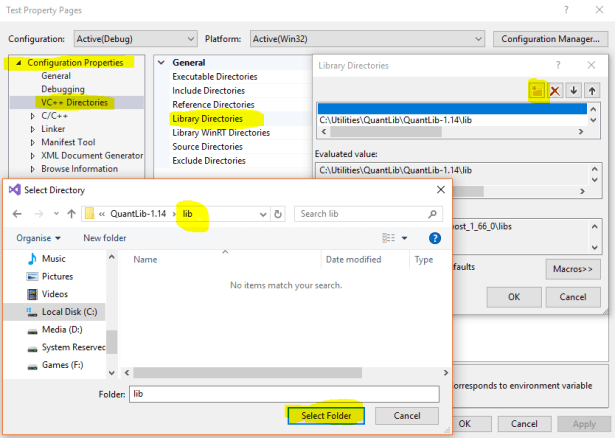
Then for Library Directories do the same but this time click on the Lib subfolder (making sure not to drill down any further in to the directory!):
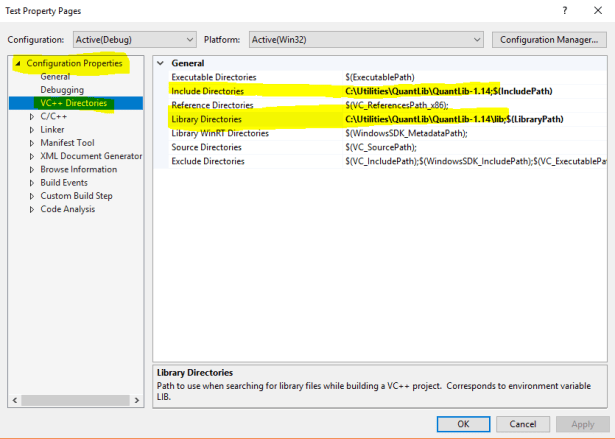
Your VC++ Directories should now look like this:
Let’s try it out. Go back to your Solution and double-click to open Test.cpp. At the very top, just below the two include instructions already there, type in #include <ql/ and wait. If you get the following drop down then you know you have successfully included QuantLib:

Select quantlib.hpp from the drop-down menu. You will notice that VS2017 will now spend a couple of seconds to parse the include file. Wait for that to finish. Now you should have access to all of QuantLib’s objects!
Pricing a Vanilla European Option
Now we want to price a vanilla European Option and return it to the Windows Console. For that to happen we need to access VS2017 iostream library (the input/output string/message library). By default, this library should already be included.
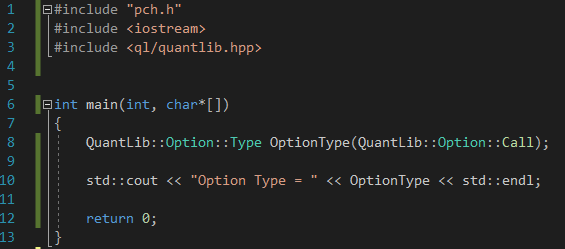
To get the console to return something simple, like the type of the option we can code in:
#include "pch.h"
#include <iostream>
#include <ql/quantlib.hpp>

int main(int, char*[])
{
std::cout << "Option Type = " << OptionType << std::endl;

return 0;
}
But it won't know what OptionType is yet. So let’s tell it.
The Type of an Option
QuantLib has a built in type (like int, double or string are types) called Type which can be assigned a special object that will determine the option type. It goes like this: First code in the object type as a prefix to the variable OptionType
QuantLib::Option::Type OptionType;
This won’t exactly work however, because the OptionType variable (of type QuantLib::Option::Type, yeah it’s weird…) requires an argument when declaring, so we have to write:
QuantLib::Option::Type OptionType(QuantLib::Option::Call);
The OptionType variable will now be a call option. The benefit of doing it this way is two-fold: 1) QuantLib’s types come with extra properties and cool stuff, so it’s always a good idea to use them!, and 2) we’ve declared it once and now we don’t have to worry about it later on.
Running the following code
will result in the following output:

Success! We’ve managed to get the Console to return the type of option.
Defining Date Properties Using QuantLib Types
Now we shall give our Option some more properties, namely it’s start and end dates. But first, before we define the dates we need a calendar so it knows what a weekend and a holiday is, and how to handle them when counting days for example. We will use the Trans-European Automated Real-time Gross settlement Express Transfer (or TARGET, see here for more details) which is the calendar used by the ECB and many other market participants.
QuantLib has a type called Calendar to which we will define our calendar variable and immediately declare it to be the TARGET calendar object:
QuantLib::Calendar calendar = QuantLib::TARGET();
Next, we will again use a QuantLib type called Date to define two more date variables called todaysDate and settlementDate. The QuantLib Date type requires an input argument when declaring, that argument being an actual date. The Date type has five overloaded declarations, we will use the easiest one in which we simply pass in the date as [d, mmm,yyyy]:
QuantLib::Date todaysDate(6, QuantLib::December, 2018);
QuantLib::Date settlementDate(6, QuantLib::December, 2018);
Note that we have to pass in a QuantLib-defined enum QuantLib::December as the month enum, again QuantLib being very user-friendly. Again, if you’re not sure what needs to be passed in just peek the definition and the class header will tell you.
Continuing in this fashion we can define the stock price, strike price, dividend yield, risk-free interest rate and volatility:
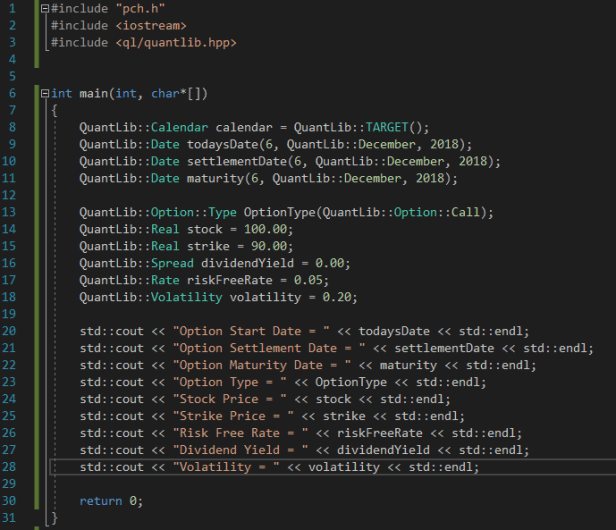
With console output:

Calculating the Price
What we really would like to do now is the output the price of this Vanilla European Option with just one line. Something like:
std::cout << "Price = " << VanillaOption.NPV() << std::end;
But we certainly do not have the machinery in place to be able to demand something like this. We need to instantiate an object that has a member function which calculates the present value of another object.
Luckily, QuantLib already has an object with such a member function: the VanillaOption class has a member function called NPV with no argument inputs. In other words, when the VanillaOption object is instantiated, all the necessary information is immediately passed in via the constructor to be able to calculate the price. So let’s define this object and call it europeanOption:
QuantLib::VanillaOption europeanOption(payoff, europeanExercise);
As you can see, we have hit a problem. The variable declaration requires two inputs: 1) a payoff object, and 2) an exercise object. So we are going to need to define these as well. Luckily, this is where Boost comes to the rescue, as it has both of these objects available to us:
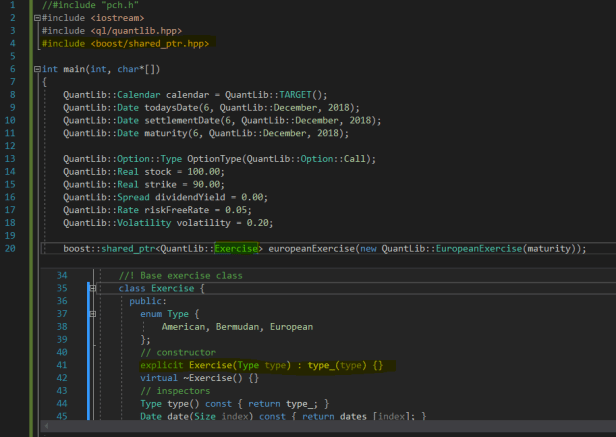
boost::shared_ptr<> europeanExercise(new EuropeanExercise(maturity));
boost::shared_ptr<> payoff(new PlainVanillaPayoff(type,strike));
(Please note the lower case boost, I initially tried it with upper case Boost and I got Error C2653: 'Boost' : is not a class or namespace name). Also note that we have not supplied the shared pointer with a type yet (inside the angled brackets).
What is a Shared Pointer?
OK, in short, the reason we use a Shared Pointer here is that in doing so we will know, for certain, that when the Shared Pointer is destroyed the object that it points to will also be destroyed and we won’t have to worry about destroying it ourselves. So (in the first line above), when Boost::shared_ptr of type Exercise points to the variable europeanExercise which has the argument of a new class, is destroyed, the object europeanExercise will also be destroyed.
What we have done here is create a (pointer to a) variable (called europeanExercise) of type Exercise (the part in the angled brackets, because Boost’s shared pointer is a template which can accept a wide range of types). And when that variable is created it demands an input of another specific type of object, namely the EuropeanExercise object.
It comes as no surprise that when creating a new object called europeanExercise that its type should be QuantLib::Exercise. We can peek at the definition of this Exercise type and see that it comes with properties like date, startdate, enddate; and enumerations like European, American and Bermudan. So this is a good type to use here. It is quite clear from peeking that when instantiating such a type that the constructor requires an argument input called Type of type Type:
The Payoff Object
Now we need a Payoff object (the 2nd argument required for declaring the europeanOption object. We will again make use of Boost’s shared pointers so we don’t have to worry about creating and destroying objects.
The payoff object will have type QuantLib::StrikedTypePayoff and we will pass in the option type (already declared), the strike value (already declared) and a new object called QuantLib::PlainVanillaPayoff. How do we know to do this? Easy, just peek at the definition of the StrikedTypePayoff type like so:
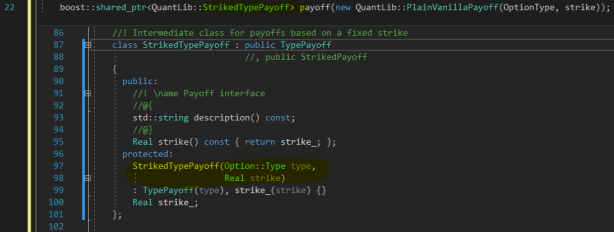
See how it requires two arguments to be passed in? Since we have already declared both of these objects (the OptionType variable and the Strike variable), we simply pass them in when instantiating the new object with the new keyword (the main reason why we use shared pointers!)
Finally, Access to a Price Function
To get at access to the europeanOption.NPV() calculation (a.k.a. the price) we need to define the europeanOption object now – this is what we have been working toward. To do so let’s declare it with type equal to QuantLib::VanillaOption like so:
QuantLib::VanillaOption europeanOption(payoff, europeanExercise)
And now we can calculate the price and return it to the console with the line
std::cout << "European Option Price = " << europeanOption.NPV() << std::endl;
Build and run…
The Pricing Engine
You should have received the following error:
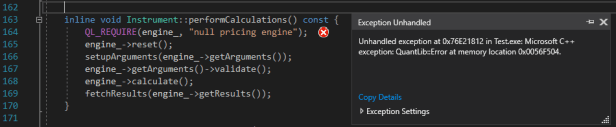
We have neglected to tell the compiler how to price the NPV of the option. Of course, there are many, many ways to price an option – we need to be precise and tell it which one to use. This is obvious from the error message – note how the exception was caught by the QL_REQUIRE macro because the Instrument’s engine property was left null.
Let’s use the Instrument’s intellisense to see if we can find a member method that allows us to set a pricing engine:
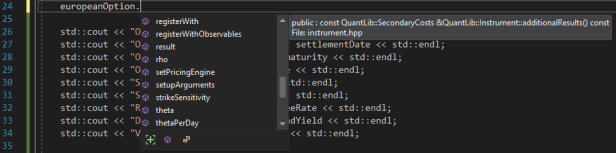
Aha! A method called setPricingEngine sounds like a good try! If we peek at the method definition we see that it requires a shared pointer to an object reference of type PricingEngine.
But this is rather involved so we will create one in the next post.
Summary
In this post we started building a test C++ program (a main program) for Windows console that used both the Boost and QuantLib libraries. We covered the necessary administration of a Visual Studio project/solution by including the files and libraries of a recently installed QuantLib library and testing that it works (i.e. able to find the include files and that intellisense works).
We were able to use some nice data types from QuantLib (namely Date, Calendar, OptionType, Real, Spread, Rate and Volatility) to setup the initial parameters of an European Option.
We then utilised Boost’s shared pointer to created pointers to newly created QuantLib objects (namely the Exercise and Payoff objects).
Finally, we used the standard iosteam library to output the results back to the console.
In the end we hit a wall because the program did not know which mathematical method it should use to price the option (there are many ways one can price an option). So in the next post we will solve the Pricing Engine issue with our program by looking at what exactly is a pricing engine, why we need one, and what kinds of engines we can choose from. That post will end with a price for our European Option.
